


Two-Factor email authentication for students
In order to minimize the threat of potential cyberattacks on student email accounts, the university has implemented two-factor authentication to confirm the identity of anyone logging into KU student email. Beyond verifying a student's username and password (which could be hacked by a cyber attacker), two-factor authentication requires students to set up a second method for verifying their identity.
This second method is linked to something the student typically has in their possession -- their mobile phone. Students can choose any of the options below for verifying their identity.
- Option 1: Push notification on mobile app (Recommended)
- Option 2: Text message (SMS)
- Option 3: Phone call
- Option 4: Hardware token
This article describes the steps for initially setting up your preferred method for two-factor authentication. See this other article if you've already set up two-factor authentication but want to change or include additional method(s).
For answers to frequently asked questions about two-factor authentication, click here.
Note: Information and some images in this article were gleaned from Microsoft user help documentation (https://docs.microsoft.com/en-us/azure/active-directory/user-help).
INITIAL SETUP OF TWO-FACTOR AUTHENTICATION
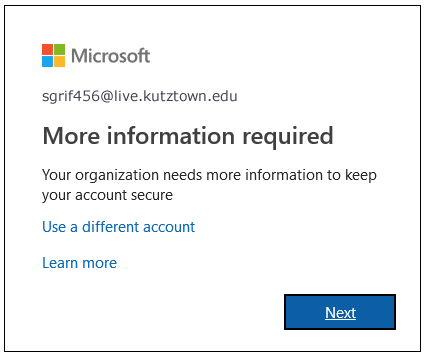
The initial setup of two-factor authentication works best from a computer rather than a smartphone. From any computer, log into your KU student email account. After a successful login, you'll be prompted for more information. Click Next and follow the instructions under any one of the options listed below.
Option 1: Push notification on mobile app (Recommended)
You can set up an authenticator app, like Microsoft Authenticator, to send a notification to your mobile device or to send you a verification code as your security verification method. KU IT recommends the Microsoft Authenticator app as the easiest and quickest way to verify your account. The app also works well in areas where you may have poor Wi-FI and/or cellular service.
Push notifications pop up on your mobile device, and you simply need to tap Approve to verify your identity.
| Important: Before getting started, you should download and install the Microsoft Authenticator app from the App Store or Google Play Store. |
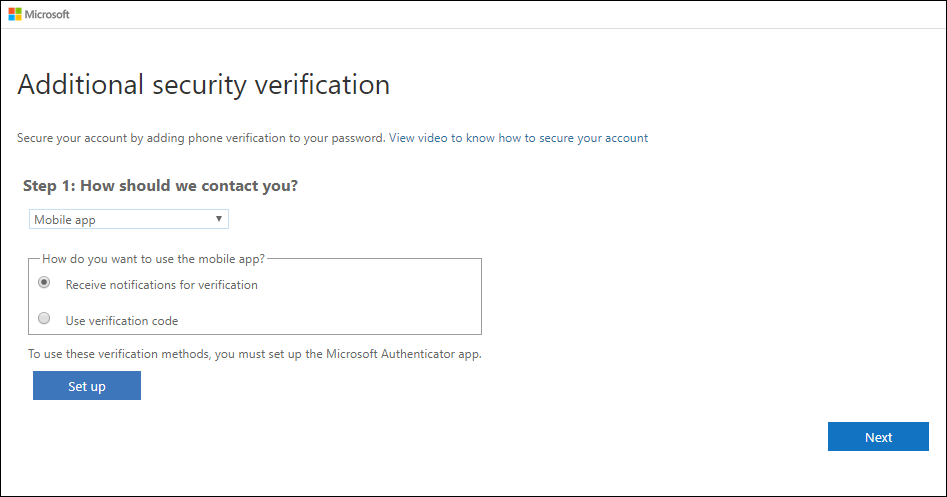
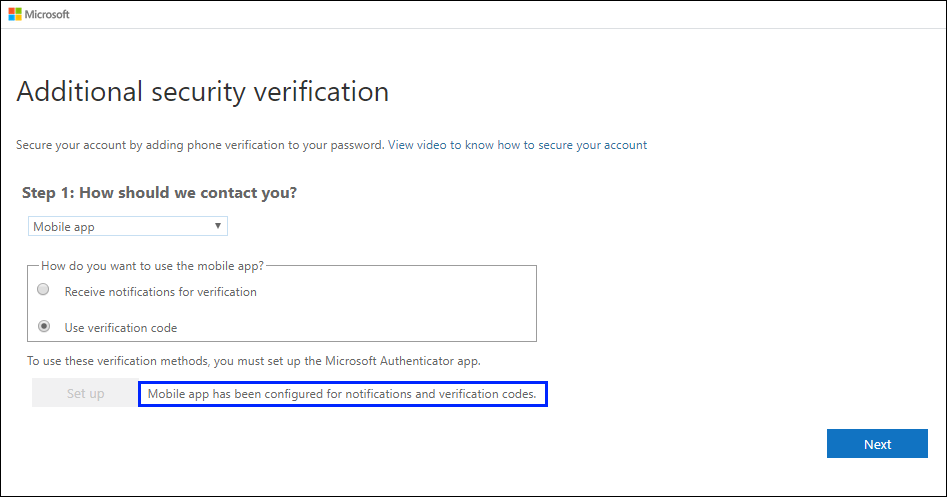
1. On the Additional security verification page, select Mobile app from the Step 1: How should we contact you area.
2. Select Receive notifications for verification from the How do you want to use the mobile app area, and then click Set up.
3. The Configure mobile app page appears.
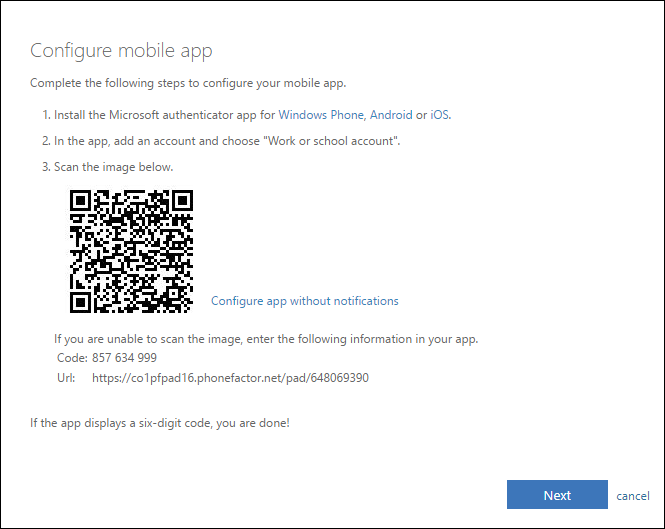
4. Open the Microsoft Authenticator app on your mobile device, select Add account from the Customize and control icon in the upper-right, and then select Work or school account.
| If this is the first time you're setting up the Microsoft Authenticator app, you might receive a prompt asking whether to allow the app to access your camera (iOS) or to allow the app to take pictures and record video (Android). You must select Allow so the authenticator app can access your camera to take a picture of the QR code in the next step. If you don't allow the camera, you can still set up the authenticator app, but you'll need to add the code information manually. For information about how to add the code manually, see Manually add an account to the app. |
5. Use your device's camera to scan the QR code from the Configure mobile app screen on your computer, and then choose Next.
6. Return to your computer and the Additional security verification page, make sure you get the message that says your configuration was successful, and then select Next.
The authenticator app will send a notification to your mobile device as a test.
1. On your mobile device, click Approve.
2. On your computer, add your mobile device phone number to the Step 3: In case you lose access to the mobile app area, and then select Next.
|
We strongly suggest adding your mobile device phone number to act as a backup if you're unable to access or use the mobile app for any reason. |
3. Click Done to complete the verification setup.
Alternate Setup: The Microsoft Authenticator app can be set up to use verification codes rather than push notifications. This alternate setup is recommended if you're in an area with no Wi-Fi or cellular service. Follow the steps below only if you'd like to set up the Microsoft Authenticator to use verification codes rather than push notifications.
1. On the Additional security verification page, select Mobile app from the Step 1: How should we contact you area.
2. Select Use verification code from the How do you want to use the mobile app area, and then click Set up. The Configure mobile app appears.
3. Open the Microsoft Authenticator app, select Add account from the Customize and control icon in the upper-right, and then select Work or school account.
| If this is the first time you're setting up the Microsoft Authenticator app, you might receive a prompt asking whether to allow the app to access your camera (iOS) or to allow the app to take pictures and record video (Android). You must select Allow so the authenticator app can access your camera to take a picture of the QR code in the next step. If you don't allow the camera, you can still set up the authenticator app, but you'll need to add the code information manually. For information about how to add the code manually, see Manually add an account to the app. |
The authenticator app will ask for a verification code as a test.
-
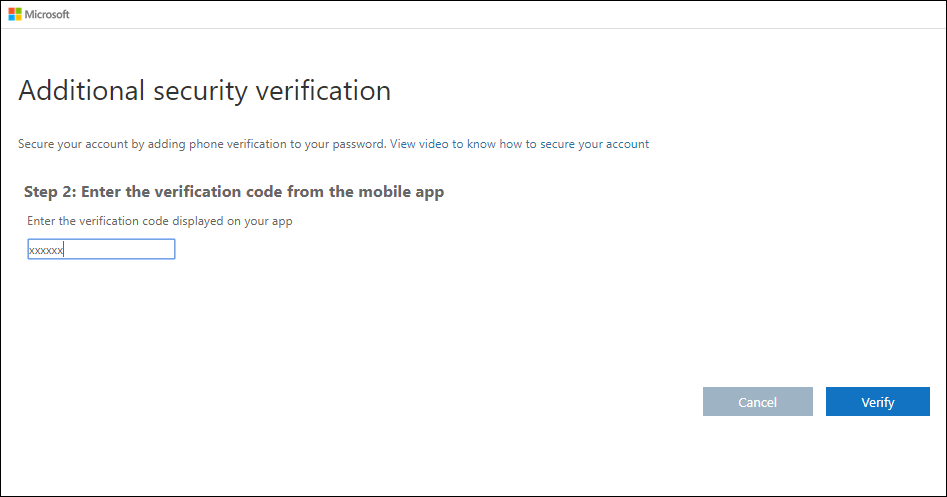
From the Microsoft Authenticator app, scroll down to your work or school account, copy and paste the 6-digit code from the app into Step 2: Enter the verification code from the mobile app box on your computer, and then click Verify.
7. On your computer, add your mobile device phone number to the Step 3: In case you lose access to the mobile app area, and then select Next.
We strongly suggest adding your mobile device phone number to act as a backup if you're unable to access or use the mobile app for any reason.
8. Click Done to complete the verification setup.
Option 2: Text message (SMS)
The major advantage of using text messages to receive a verification code is that it doesn't require installation of an app. However, keep in mind that you could have problems receiving text messages if you're in an area with poor cellular service.
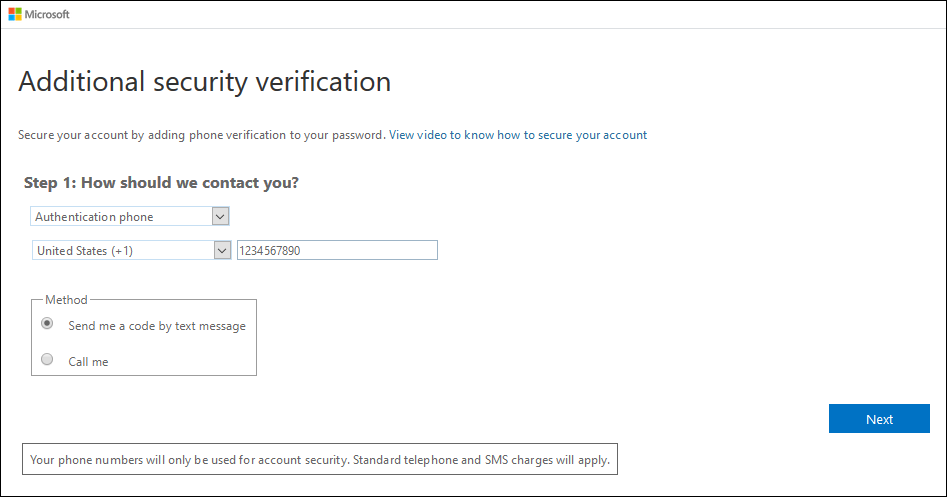
1. On the Additional security verification page, select Authentication phone from the Step 1: How should we contact you area, select your country or region from the drop-down list, and then type your mobile device phone number.
2. Select Send me a code by text message from the Method area, and then click Next.
3. Type the verification code from the text message sent from Microsoft into the Step 2: We've sent a text message to your phone area, and then click Verify.

4. Click Done to complete the verification setup.
Option 3: Phone call
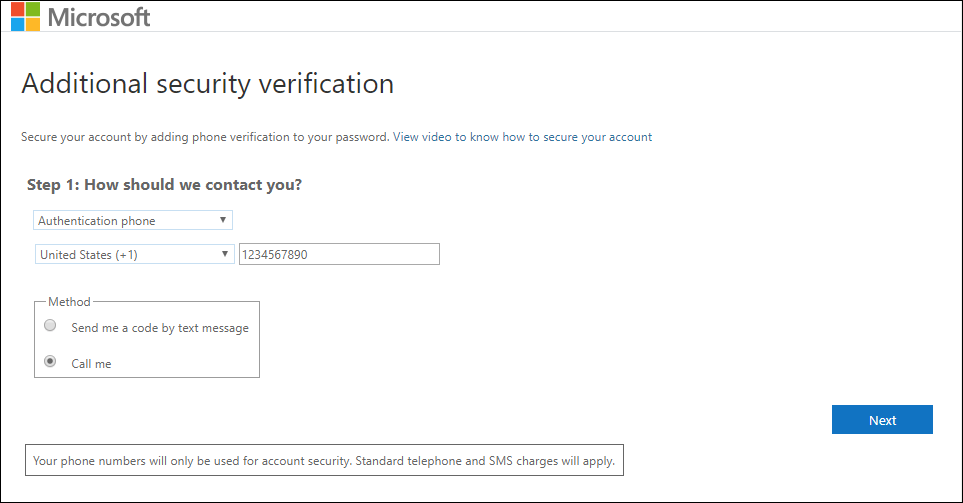
1. On the Additional security verification page, select Authentication phone from the Step 1: How should we contact you area, select your country or region from the drop-down list, and then type your mobile device phone number.
2. Select Call me from the Method area, and then click Next.
3. You'll receive a phone call from Microsoft, asking you press the pound (#) sign on your mobile device to verify your identity.
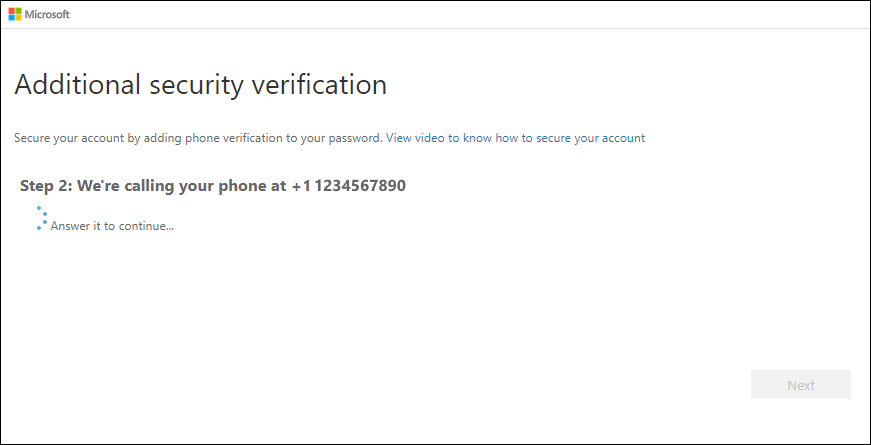
4. Click Done to complete the verification setup.
Option 4: Hardware token
A hardware token is a device you keep with you that can display a code to verify your identity. This may be an option for students who don't have access to another mobile device. If you'd like to learn more about hardware tokens, please contact the KU IT Help Center.
Manually add an account to the app
|
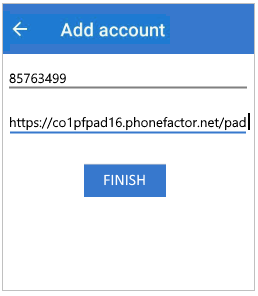
NOTE: If you have problems scanning the QR code, note the Code and URL information listed below the QR code. Then follow these steps:
|